CREATE A SIMPLE GRAPHQL API
How to create a very simple GRAPHQL API with AWS AppSync.
Log into AWS and open the “AWS APPSYNC” module. This is where we will create an APPSYNC API to be used later.
 |
1. Click the orange Create API in the upper right hand corner of the page.
Screen should look like the one to the left.
|
 |
2. Click “Create with wizard” in order to build a very simple GraphQL API. AWS does much of the work for you this way.
Screen should look like the one to the left. |
|
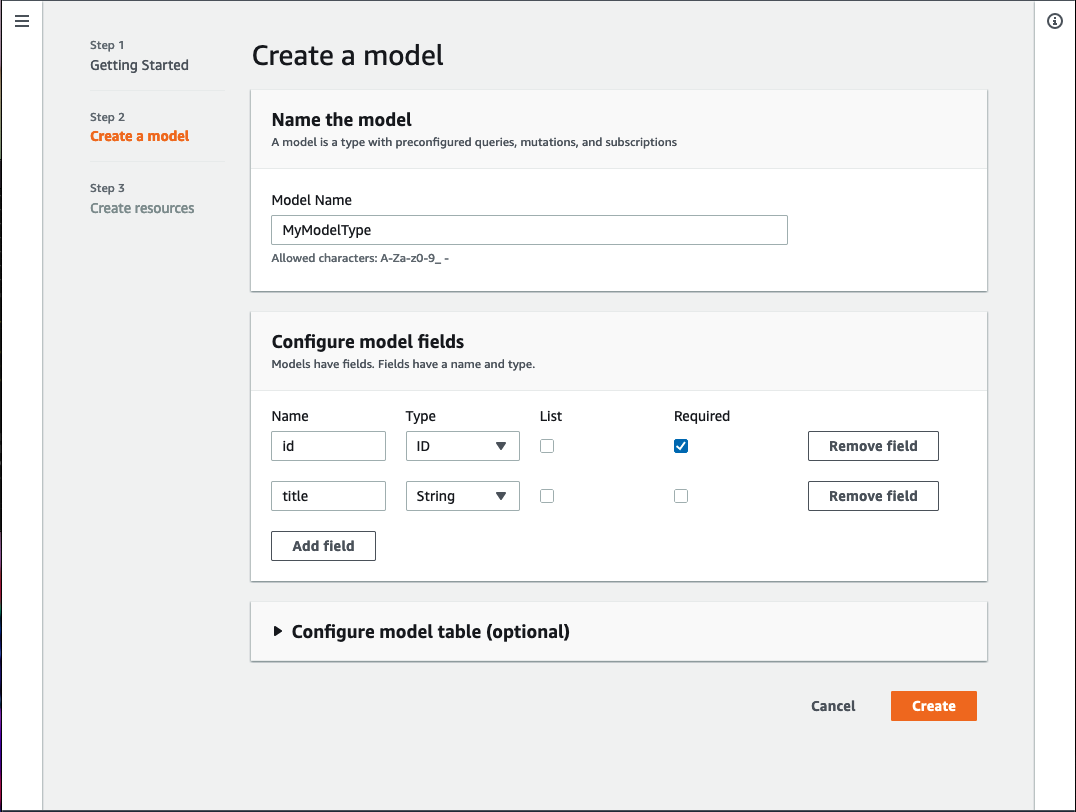
3. Enter in “firstName”, “lastName” fields and name the api model “testModel”.
Screen should look like the one to the left. |
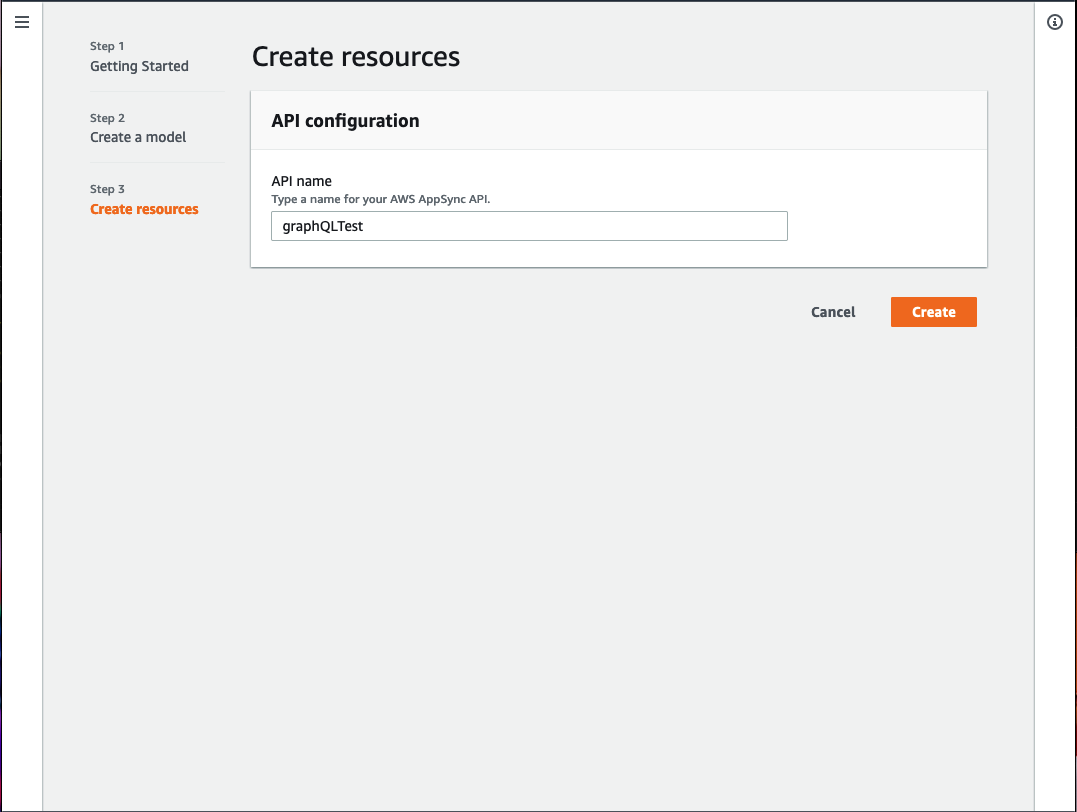 |
4. Once you hit “Start”, you will enter the name of your app as “graphQLTest”
Your screen should look like one to the left. |
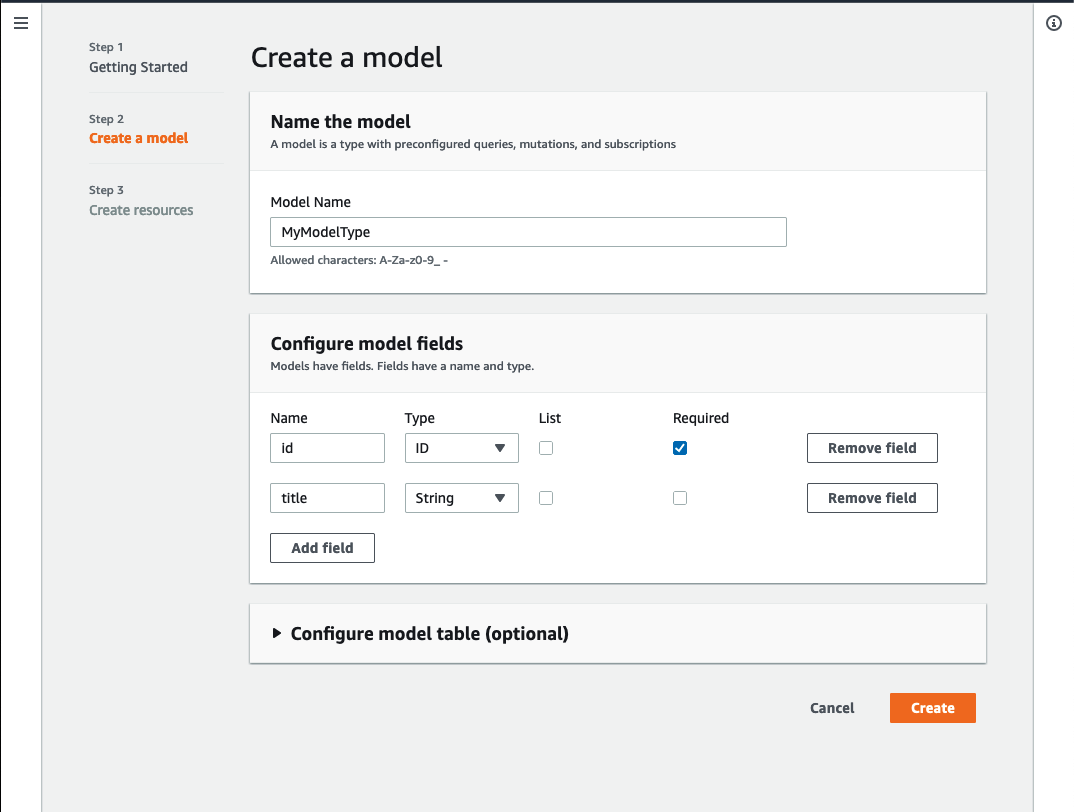 |
5. Click “Start“ to begin the wizard. It will open to the model edit screen.
Your screen should look like one to the left. |
 |
6. You will leave everything the same and hit “create”.
Your screen should look like one to the left. |
 |
7. Once again, you will leave everything the same and hit “create”. This time, after the dynamodb builds,
Your screen should look like one to the left. |
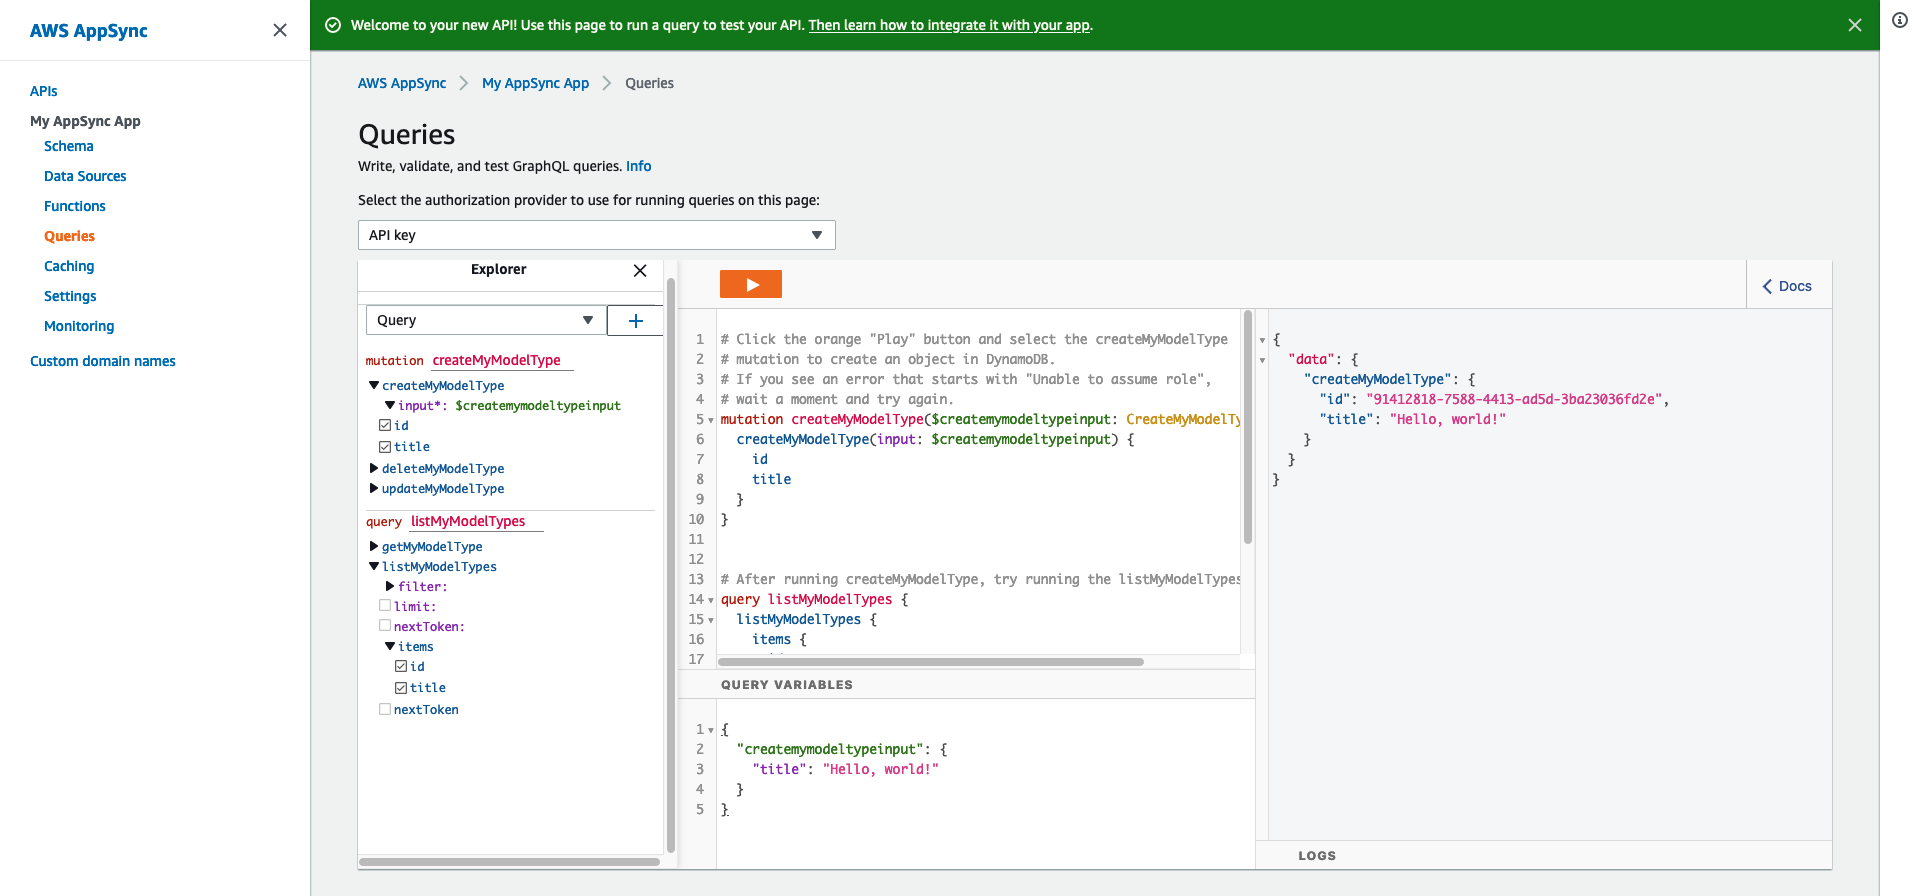 |
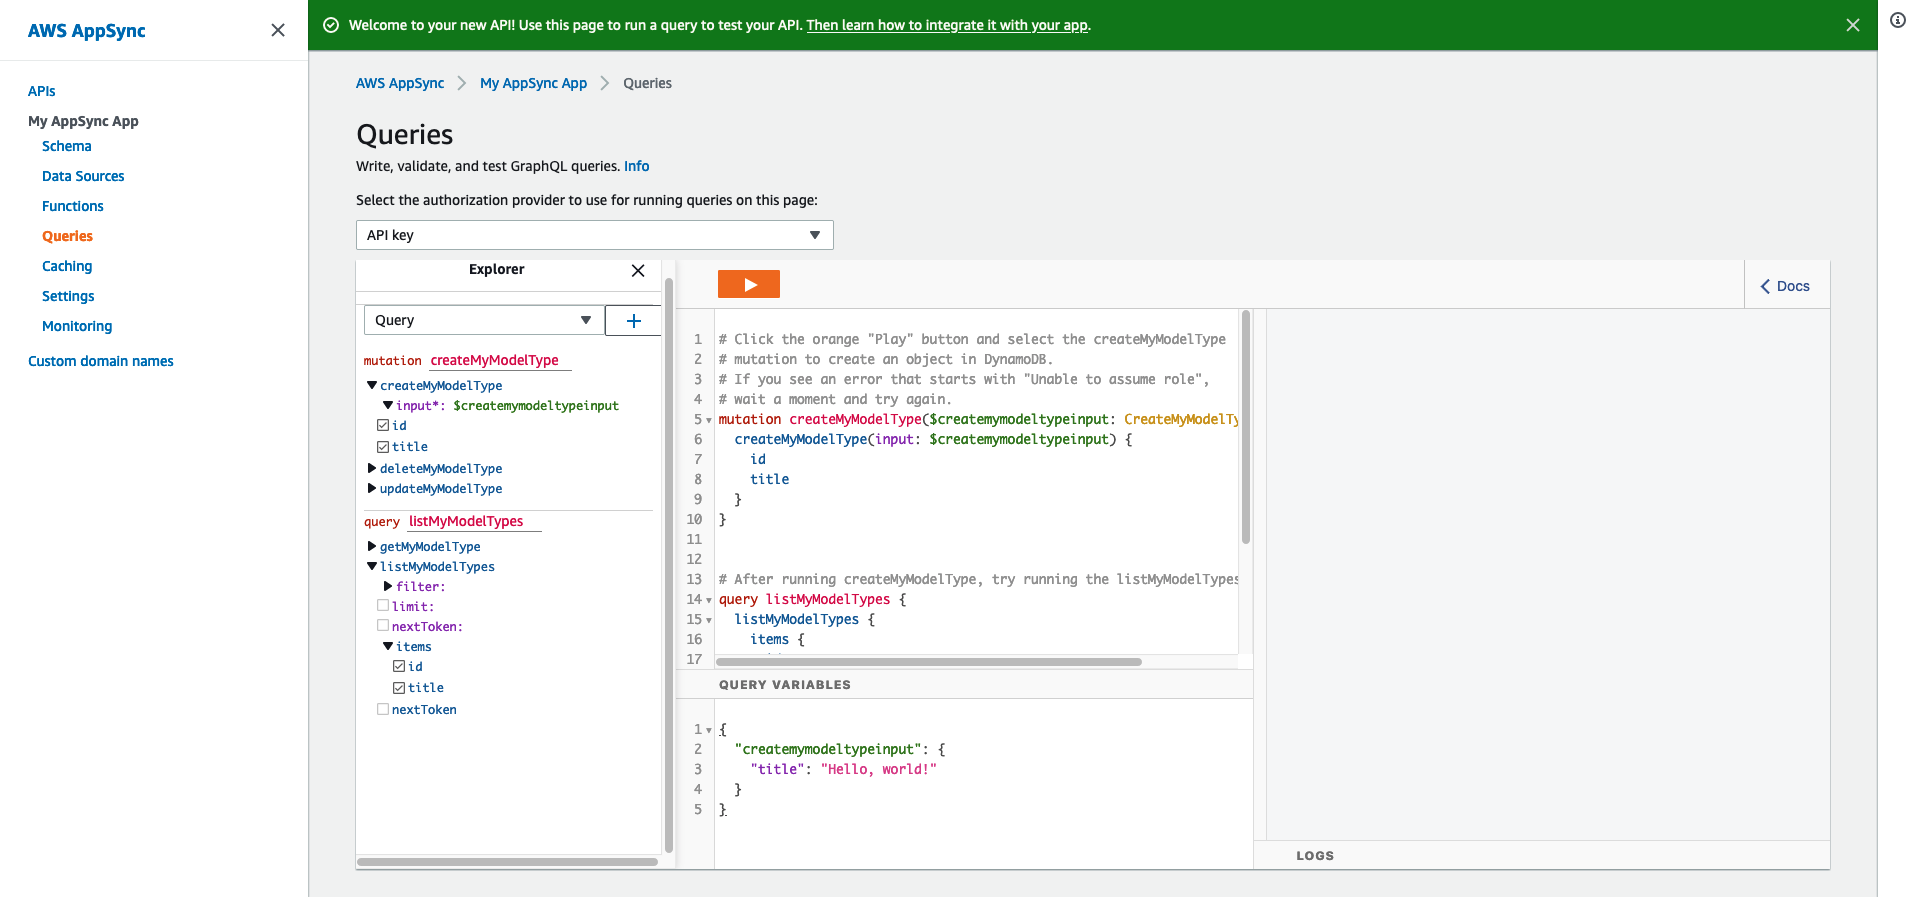
8. Click on the orange array, and choose “createMyModelType” in order to generate the model.
Your screen should look like one to the left. |
 |
9. Next click the orange array about and choose “createMyModelType”, in order to insert a record into this new dynamoDB table.
Your screen should look like one to the left. |
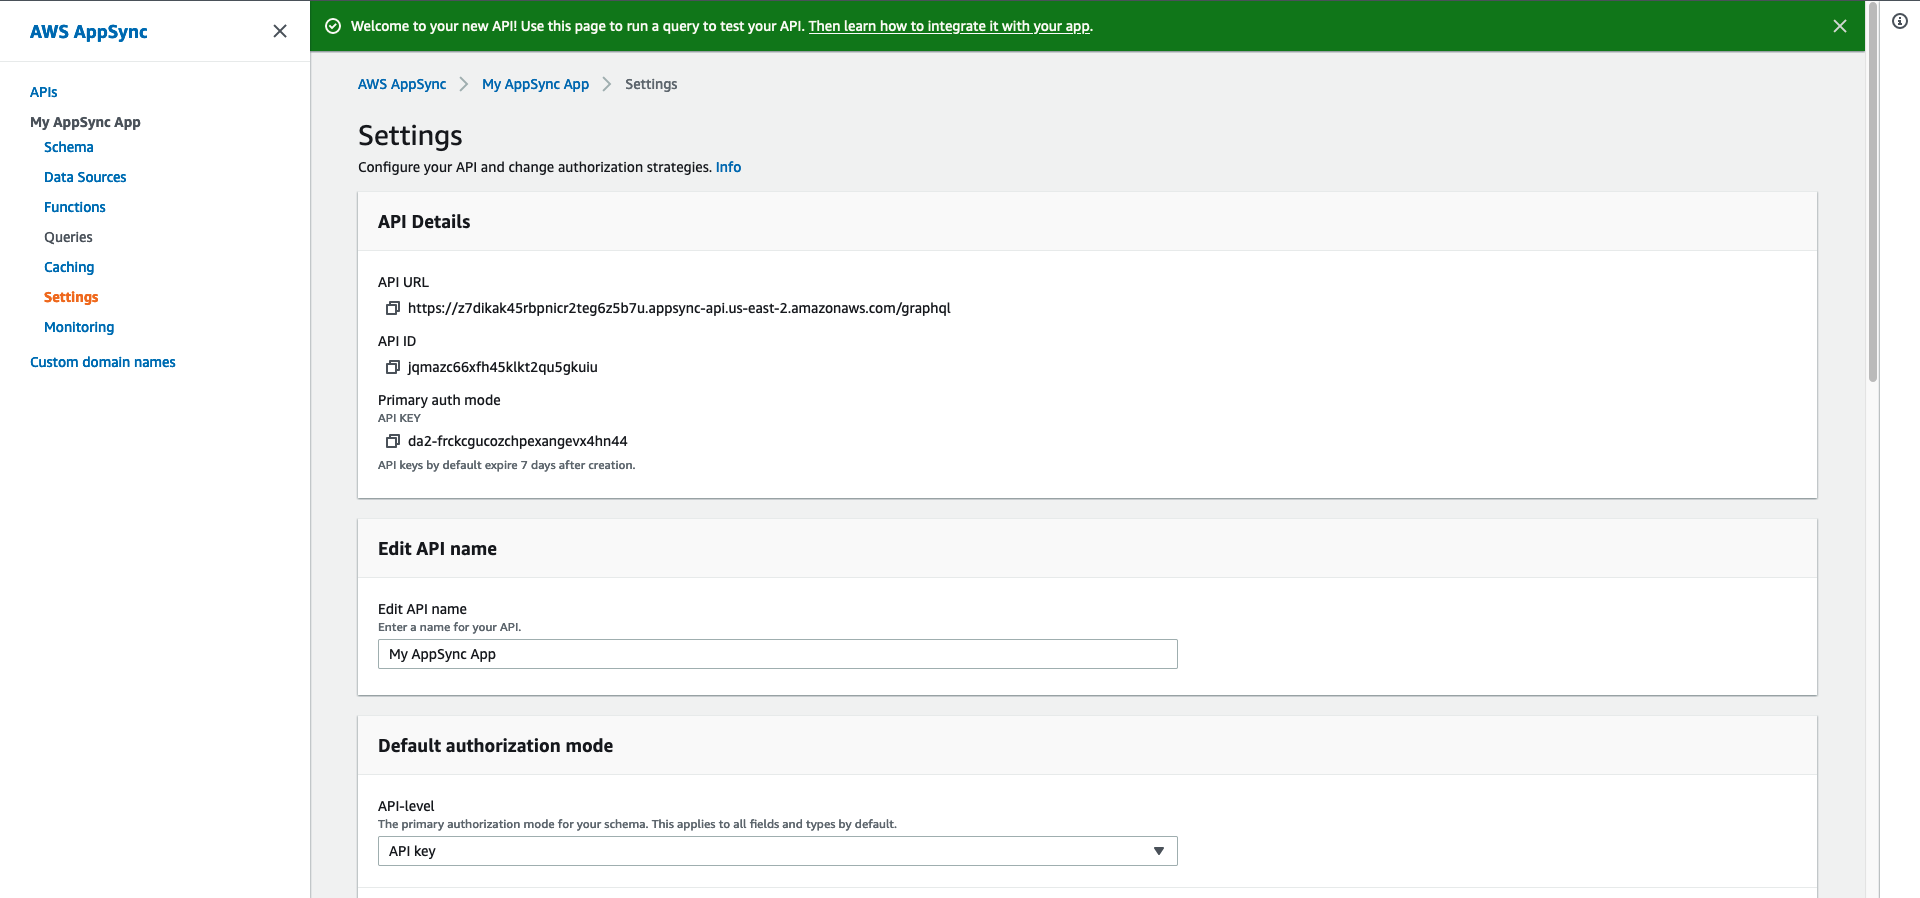 |
10. Now your api is generated. We need to get the information to call it. Next, click on the “Settings” tab.
Your screen should look like one to the left. |
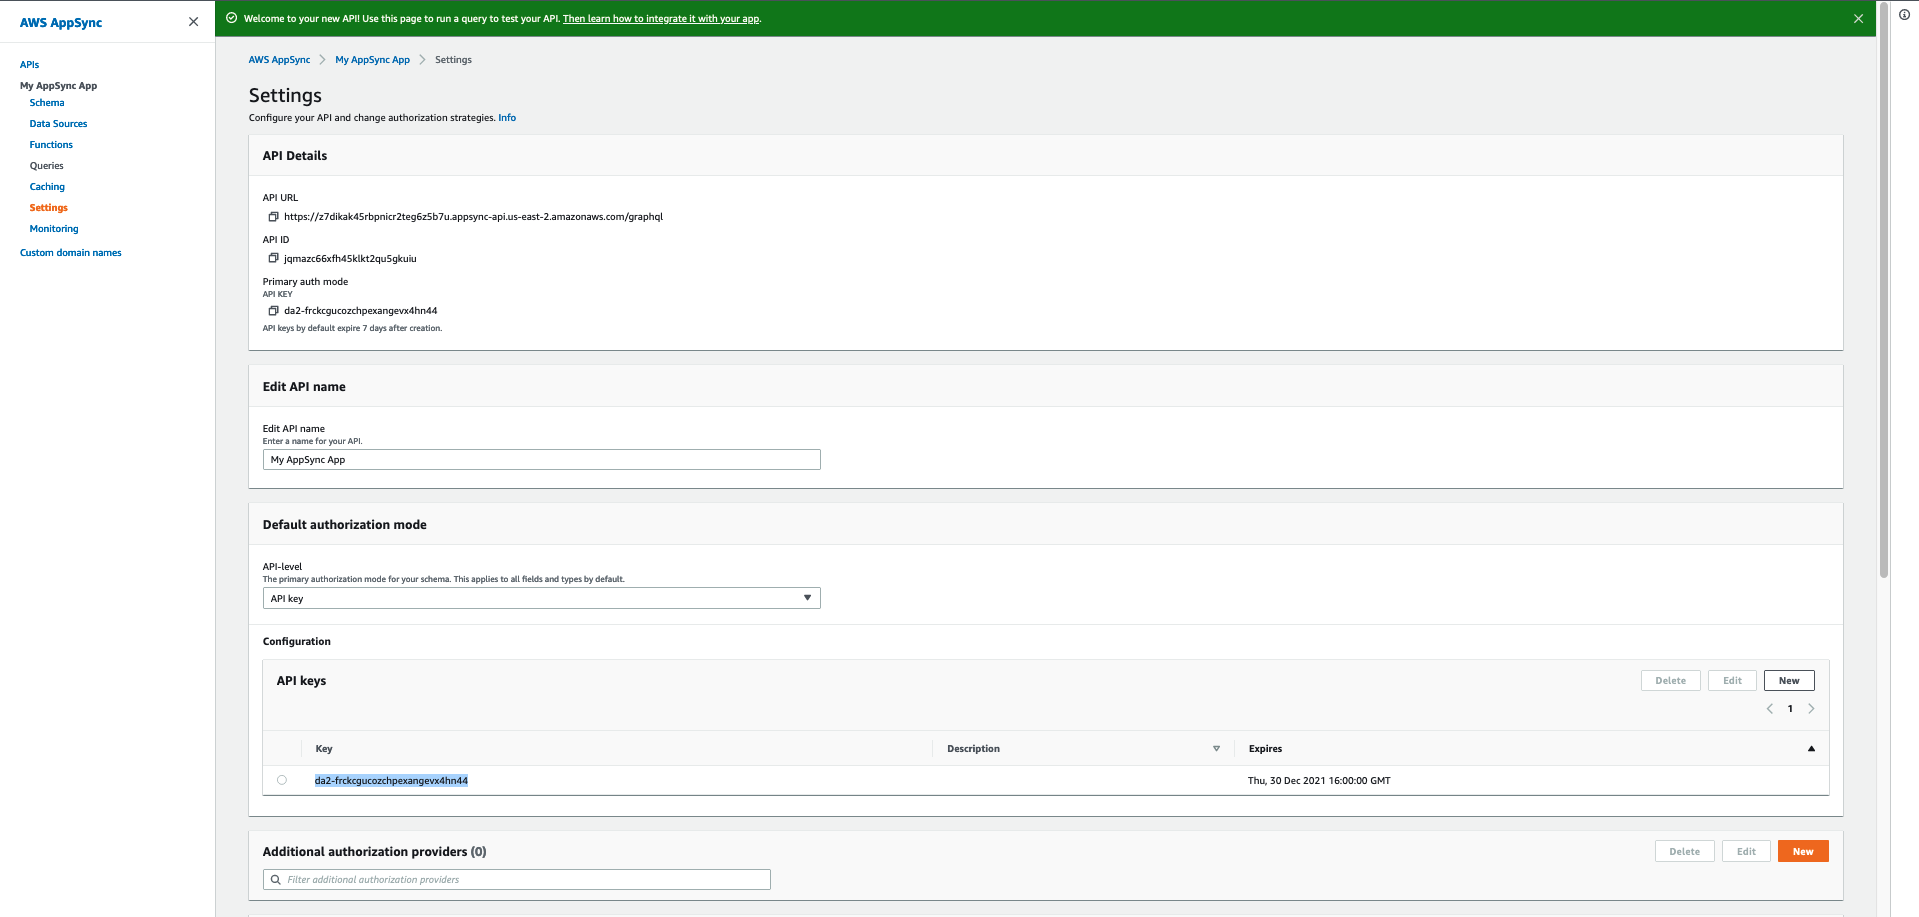 |
11. Write down the API URL, as well as the api key listed under “API Keys”.
Your screen should look like one to the left. |
| Now you have a GRAPHQL Api..pretty simple eh? You can call it using any language you wish. | |